A blister can ruin a good hike like almost nothing else. One minute everything feels fine, then you notice a slight rub on your heel or toe, and before long that tiny irritation is getting more of your attention than the trail, the weather, or anything else around you. It’s one of those hiking problems that sounds relatively minor until it happens, and then suddenly it’s the only thing you can think about.
The frustrating part is that blisters often feel random, especially if you’re wearing decent boots and doing everything you think you should be doing. But the reaity is they usually aren’t random at all – which is good news, because it means they’re almost entirely preventable.
Hiking blisters happen because friction builds up on the skin, often made worse by moisture, heat, foot movement inside your footwear, or pressure in the wrong place. If you want to know how to stop blisters when hiking, the basic goal is to reduce rubbing, keep your feet as dry as possible, and deal with hotspots early, before they turn into something worse.
That all sounds simple enough, but of course the devil is in the details. Sometimes the problem boils down to whether your boots fit properly, sometimes it’s your socks, sometimes your feet are getting damp without you really noticing, and sometimes the issue is just a small amount of movement in one area that repeats itself often enough to cause damage. The result is the same either way – your skin starts protesting, and once it does, the hike tends to revolve around it.
The good news is that blisters are usually easy to avoid once you understand what’s causing them. This isn’t one of those mysterious outdoor misfortunes that you just have to accept as part of the experience. Most of the time, there’s a weak point in the chain, and once you spot it, whether it’s poor fit, damp socks, bad lacing, or ignoring the first signs of rubbing, the whole thing becomes much easier to manage.
In this guide, we’ll look at why blisters happen when hiking, how to give yourself the best chance of preventing them before your hike even starts, what bits of gear genuinely help, which habits matter more than people realise, and what to do if you feel one starting while you’re still out on the trail.
Contents
- Why Blisters Happen When Hiking
- The Three Things That Stop Blisters
- How to Set Your Feet Up Before You Start Walking
- Gear That Actually Helps Prevent Hiking Blisters
- What to Do If You Feel a Blister Starting While Hiking
- How to Treat a Blister While Hiking
- Frequently Asked Questions
- Final Thoughts
Why Blisters Happen When Hiking
Blisters usually happen because the same bit of skin is being irritated again and again as you walk. Your foot moves inside your boot, your sock rubs slightly, your heel lifts, your toes press forward on a downhill section, or one small area keeps taking pressure every time you step. And although none of that might seem like much at first, hiking gives those tiny problems plenty of time to build into something painful.
That’s the part I think people often underestimate. A blister doesn’t need one glaring, obvious cause. Your boots don’t have to be terrible, your socks don’t have to be useless, and you don’t need to have made some ridiculous rookie mistake. Sometimes you’ve done almost everything right, but one small thing is slightly off, and after a few miles that tiny bit of rubbing or pressure is enough to start causing real discomfort.
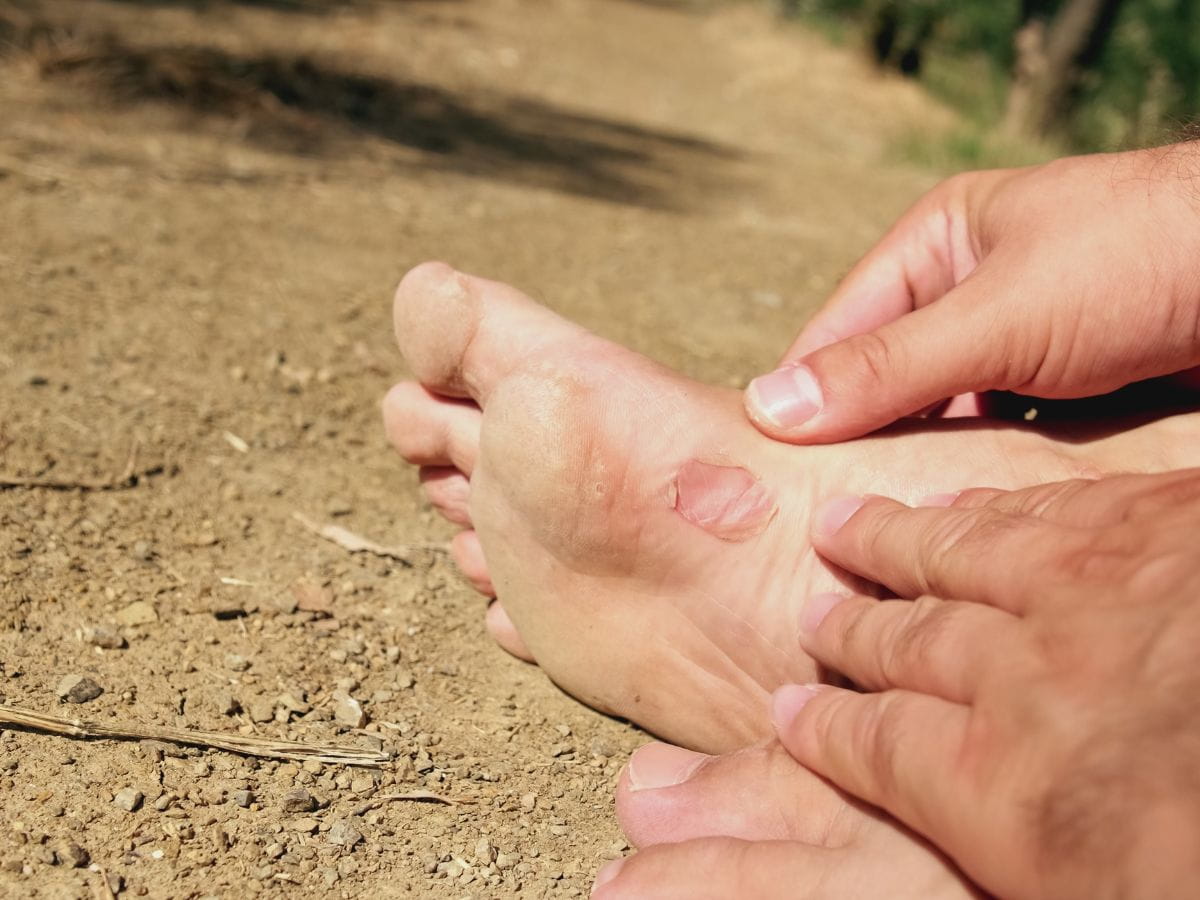
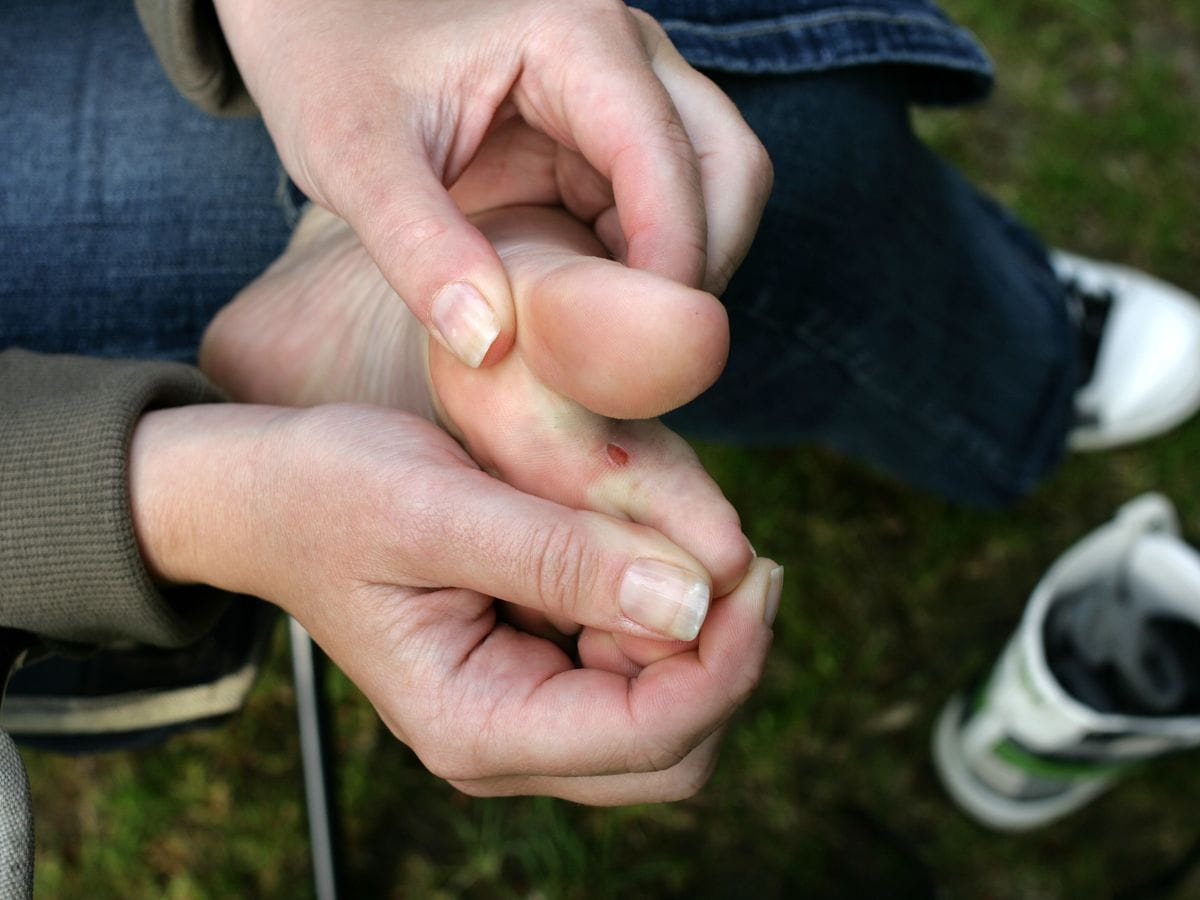
Usually, the first sign is a hotspot. It might feel warm, sore, slightly rubbed, or just more noticeable than the rest of your foot, and that’s the point where you still have a good chance of stopping it before it turns into a proper blister.
This is also where I’ve gone wrong before. You notice that little bit of rubbing and think you’ll sort it in a minute, then you carry on because stopping feels like a faff, you don’t want to take your boot off, mess around with your sock, hold anyone up, or make a big thing of it when it isn’t even properly painful yet. Then twenty minutes later it’s worse, and now you’re stopping anyway, except the skin is more irritated, the hike is less enjoyable, and you’re annoyed with yourself because you knew it was coming.
Moisture also makes the whole thing worse because damp skin is easier to irritate. If your feet get sweaty, your socks stay damp, or your boots get wet from rain, puddles, muddy paths, or wet grass, the skin becomes softer and more vulnerable to rubbing. Which is exactly why blisters often show up faster on warm days, longer hikes, or wet routes, even if you’ve worn the same boots before without any trouble.
Fit matters as well, but not always in a “these boots are clearly the wrong size” kind of way. A boot can feel fine when you first put it on and still be slightly too roomy around the heel, slightly tight across the toes, or just the wrong shape for your foot in one particular place. If your heel is lifting or rubbing at the back of the boot, our guide on why your heels hurt in hiking boots goes into that properly, because heel movement is one of the most common reasons people end up with soreness, hotspots, and blisters.
Socks also play a bigger role than people think. A good hiking sock helps manage moisture, reduce rubbing, and cushion your foot where it needs it, while the wrong sock can bunch up, hold sweat, slip around, or rub in the same place all day. If you’re still wearing ordinary cotton socks on hikes, or your feet always seem to end up damp, it’s worth reading our guides on whether hiking socks actually make a difference and the best hiking socks for wet feet, because this is one of those boring little gear choices that can make a very real difference once you’re a few miles in.
The main thing to remember is that blisters are rarely random. They usually come from a small problem that repeats for too long, whether that’s movement, moisture, pressure, poor fit, or a hotspot you noticed early but didn’t deal with. Once you understand that, prevention becomes much easier, because you’re not trying to toughen your feet up or hope for the best, you’re looking for the weak point early enough to fix it before your skin has had enough.
The Three Things That Stop Blisters
Once you understand what causes blisters, the prevention side becomes much less mysterious. You don’t need to do twenty different things, and you definitely don’t need to turn every hike into a full foot-care ceremony before you’ve even left the house. Most of it comes down to three basic ideas: stop your feet moving too much inside your boots, keep your skin as dry and comfortable as possible, and take the first sign of rubbing seriously.
That sounds almost too simple, but it’s the bit that matters. Most blister advice gets lost in products, plasters, powders, sock systems, boot brands, and clever little tricks that may or may not work depending on your feet. Some of that stuff can be useful, and we’ll get to it, but none of it matters much if you ignore the basics. If your heel is sliding, your socks are damp, and you keep walking on a hotspot for another hour, even the fanciest blister plaster in the world is mostly just arriving late to the meeting.
The first job is to reduce unnecessary movement. Your foot should have enough room to move naturally, because nobody wants their toes crushed into the front of a boot all day, but it shouldn’t be sliding around either. If your heel lifts with every step, or your foot moves forward every time the path slopes downhill, that movement is going to create rubbing sooner or later. This is why fit is so important, and also why a boot can feel comfortable at first but still cause problems after a few miles.
If you already suspect your boots are slightly too roomy, our guide on what to do if your hiking boots are too big is worth reading, because even a small amount of extra space can create more movement than you realise.
The second job is to manage moisture. You don’t need bone-dry feet every second of the walk, which is lucky really, because hiking in Britain tends to involve a certain amount of dampness whether you invited it or not. But you do want to avoid your feet sitting in sweaty, wet, clammy socks for hours if you can help it. Damp skin rubs more easily, and once your socks start holding moisture, every small fit issue tends to become more noticeable. This is where proper hiking socks, breathable footwear, and carrying a spare pair on longer walks can make a bigger difference than people expect.
The third job is to act early, which sounds obvious but still catches people out. A hotspot is not something to bravely ignore for the next three miles. It’s the warning light. If a small area starts feeling warm, rubbed, sore, or unusually noticeable, stop and deal with it before it turns into a blister. Adjust your laces, smooth your sock, dry the area if you can, add tape or a blister plaster, and then carry on. It might feel like a faff in the moment, but it’s a much smaller faff than limping back with a blister you could have prevented.
I think this is the biggest mindset shift with blisters. Prevention is not something you do once at the start of the hike and then forget about. It’s something you stay loosely aware of as you hike, especially if you know you’re prone to rubbing in certain places. If you always blister on the back of your heel, protect that area before it starts. If your little toe always complains on long descents, don’t wait for it to become a problem. If your socks get wet halfway through a route, change them before your feet start suffering. The more you know your own pattern, the easier it is to stay ahead of it.
And that’s really the point. Stopping blisters when hiking is not about having perfect feet or perfect gear. It’s about noticing where things usually go wrong and sorting them before they get a chance to build. Once you get into that habit, blisters stop feeling like random bad luck and start feeling like something you can usually control.
How to Set Your Feet Up Before You Start Walking
By this point, we know the basic idea: stop rubbing, keep things dry, and deal with trouble early. So before you even start walking, the aim is to give your feet the best possible starting conditions.
That doesn’t mean doing anything dramatic. You don’t need to sit on the boot of the car performing some elaborate pre-hike foot ritual while everyone else wonders if you’ve taken up fell walking or amateur surgery. It’s mostly about checking the simple things that are easy to overlook when you’re keen to get going.
Start with your feet themselves. If your toenails are too long, trim them before the hike, especially if there’s any downhill walking involved. It sounds minor, but long toenails can press against the front of your boots, rub against neighbouring toes, or make your foot sit slightly differently inside your footwear.
It’s also worth checking for dry, cracked, or rough areas of skin, especially around the heel, toes, and ball of the foot. You don’t need baby-soft feet, and in fact nobody is asking for that from a hiker, but very rough skin, hard edges, or existing sore patches can become irritation points once you add heat, socks, boots, and several miles of walking. If you already know one part of your foot tends to rub, don’t wait until it starts again before doing something about it.
This is where a bit of preventative taping can make sense. Not plastering your entire foot like you’re preparing it for storage, but covering the areas you know are likely to cause trouble. If you always get rubbing at the back of one heel, tape that spot before you leave. If your little toe tends to get squeezed on descents, protect it before the first downhill section. The best time to use tape is often before anything hurts, because at that point you’re preventing damage rather than trying to patch up damage that has already started.
Then look at your socks before you put your boots on. This might sound obvious, but it’s the sort of thing you only regret skipping once you’ve been walking for half an hour and that tiny wrinkle under your toes has become impossible to ignore. Make sure the sock is pulled on smoothly, with no bunching under the toes, no twisted heel section, and no seam sitting somewhere annoying.
If you’re wearing liner socks, this is where they need to sit properly too. Some people swear by them, others find them unnecessary, but the point is the same either way: whatever is touching your foot needs to stay smooth and comfortable. If your sock system starts badly, it usually doesn’t improve on its own once your feet get warm and your boots are laced up.
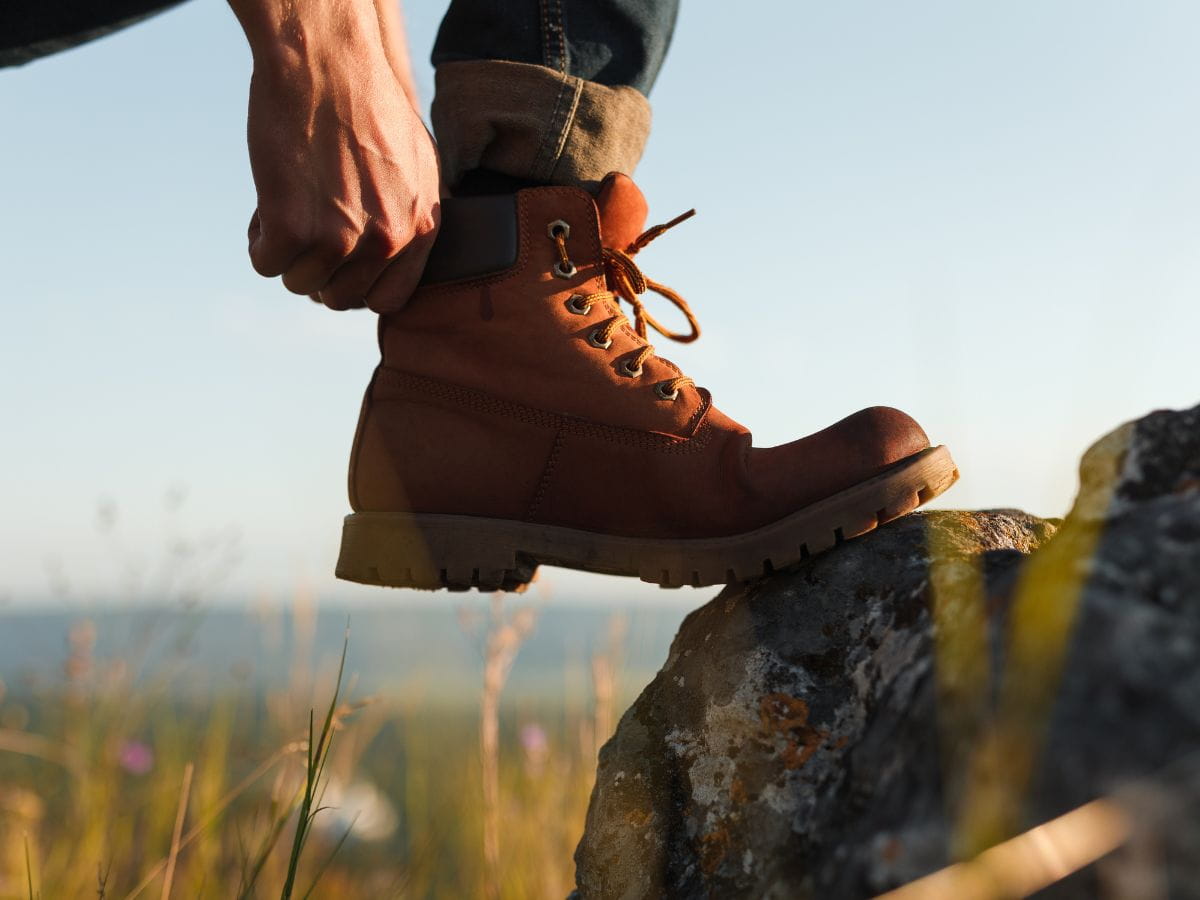
When you put your boots or shoes on, take a minute to seat your heel properly before tightening the laces. Push your heel back into the heel cup, then lace from there rather than just yanking everything tight and hoping for the best. The aim is to hold your foot securely without crushing it, so your heel isn’t lifting at the back and your toes still have enough room at the front. If you’re already aware that your boots feel a bit loose, especially around the heel or midfoot, it’s worth sorting that before the walk rather than finding out three miles later that “probably fine” was not, in fact, fine.
This is also a good moment to think about what sort of route you’re doing. A short, flat walk in cool weather is one thing. A long, wet, hilly route is another. If you know you’ll be dealing with boggy ground, rain, beach paths, stream crossings, or a lot of climbing and descending, it makes sense to be a little more cautious from the start. For wet or unpredictable conditions, carrying spare socks is one of those boring decisions that can save a hike, and if your route involves rain or damp ground, our guide to camping in the rain has a few useful thoughts on staying comfortable when everything starts getting a bit soggy.
The same goes for what you carry. You don’t need a full medical kit just for a day hike, but you do want blister plasters, tape, or dressings somewhere you can actually reach them. If they’re buried at the bottom of your bag under waterproofs, food, spare layers, and the thing you packed “just in case” but have never once used, you’re much less likely to stop and deal with a hotspot early. Keep the foot-care bits accessible, because they only help if you can be bothered to use them at the right moment.
For longer trips, especially if you’re carrying camping gear, this becomes even more important. More weight means more pressure through your feet, and more time walking usually means more opportunities for small problems to build. This doesn’t mean you need to pack like you’re crossing Antarctica, but it does mean being realistic about what your feet are going to deal with. If you’re trying to keep your pack sensible, our guide to lightweight camping is built around the same idea: carry what genuinely helps, and don’t fill your bag with things that only look useful at home.
The last thing I’d do before setting off is simply pay attention to how everything feels in the first few minutes. Not obsessively, and not in a way that ruins the hike before it starts, but enough to notice if something is obviously wrong. If a lace feels too tight, loosen it. If your sock feels bunched, fix it. If your heel is already moving, don’t tell yourself it’ll settle down. A lot of blister prevention is just giving yourself permission to sort small things while they’re still small.
That’s really the point of the pre-hike stage. You’re not trying to guarantee a perfect walk. You’re just removing the silly, preventable problems before they get a chance to become the main event.
Gear That Actually Helps Prevent Hiking Blisters
Once you’ve sorted the basics, the right gear can make a real difference, but it helps to think of blister products as problem-solvers rather than magic objects.
That’s where people sometimes go wrong. They buy blister plasters, powders, fancy socks, anti-chafe balm, tape, insoles, liners, and half the contents of a small pharmacy, then assume they’re protected because they now own enough foot-care items to alarm a customs officer. But gear only really helps if it matches the problem you’re trying to solve.
If your heel is lifting, a blister plaster won’t fix the movement. If your feet are sweating heavily, thicker socks might make things worse rather than better. If your little toe is being pinched, powder probably isn’t going to do much beyond making your foot smell slightly less horrific. The useful question is not “what blister product should I buy?” but “what problem am I actually trying to solve?”
Tape is probably one of the most useful things to carry, especially if you already know where you tend to rub. It’s light, cheap, and simple, and you can use it before a problem starts or as soon as you feel a hotspot. The key is to apply it smoothly, without wrinkles, and ideally before the skin is already sore. If you wait until the area is angry and tender, tape can still help, but it’s now doing damage control rather than prevention.
Blister plasters are useful too, but they’re often misunderstood. They’re brilliant when you need to protect an area that’s already irritated or blistered, especially if you still have to keep walking, but they’re not always the best first line of defence for every tiny rub. On clean, dry skin they can work extremely well, but if your foot is sweaty, dirty, hairy, or already damp, they may not stick properly, and once a plaster starts peeling inside a sock it can become its own little problem. Very helpful when used well, slightly annoying when used badly, which is true of more hiking gear than anyone likes to admit.
Anti-chafe balm or lubricant can be useful for areas that rub but don’t need structural protection, especially between toes, around the heel, or anywhere your sock and skin tend to drag against each other. Some hikers swear by it. Others find it wears off too quickly or makes their socks feel odd. It’s one of those things that’s worth testing on shorter hikes before trusting it on a long route, because your feet may have their own view on the matter.
Foot powder is mainly about moisture. If your feet get sweaty and your socks tend to stay damp, powder can help reduce that clammy feeling and keep things more comfortable for longer. It won’t solve a bad fit, and it won’t stop a heel lifting in your boot, but for people with sweaty feet it can be a useful part of the system. The mistake is expecting it to do everything. It’s a moisture tool, not a miracle.
Insoles can help if your foot needs a bit more support or if your boot has slightly too much internal space, but again, they need to match the problem. A better insole can sometimes reduce movement, improve comfort, and stop your foot sliding around as much, but it can also make a boot feel tighter if there wasn’t much room to begin with. If your footwear already feels snug across the top or tight around the toes, adding more volume inside it may just move the problem somewhere else.
Toe protectors, toe sleeves, and gel caps can be useful if your blisters usually happen around the toes rather than the heel. These are especially worth considering if one toe rubs against another, or if your little toe gets squeezed on descents. They’re not something everyone needs, and they can feel strange at first, but for the right person in the right spot they can be much more useful than simply sticking a plaster on after the damage has started.
Liner socks are another option people often talk about. The idea is that the liner sock moves against the outer sock, rather than your skin taking all the friction. Some hikers find this works brilliantly, while others find it too warm, too fiddly, or just unnecessary. I wouldn’t treat liner socks as essential, but if you regularly blister despite wearing decent hiking socks, they’re one of those things that might be worth experimenting with on a shorter hike.
The main thing with all of this gear is to test it before you need it. A long hike is not the ideal place to discover that your blister plaster won’t stick, your tape rolls up at the edges, your new insoles squash your toes, or your anti-chafe balm makes your socks feel like they’ve been lightly buttered. Try things on normal walks first, then keep what works and forget the rest.
For most people, a sensible blister kit doesn’t need to be complicated. A few blister plasters, some tape, maybe a small dressing or two, and whatever you personally know helps your feet is usually enough for a day hike. For longer routes, wet conditions, or multi-day trips, you might add spare socks, foot powder, toe protection, or extra dressings, but it still comes back to the same principle: carry what solves your actual problems, not everything the internet has ever recommended.
That’s the gear side of it. Useful, definitely, but only when it supports the bigger habit, which is noticing problems early and dealing with them before they become a much more irritating part of the day.
What to Do If You Feel a Blister Starting While Hiking
You can do everything right before the hike starts and still feel that little warning rub halfway round, because feet are annoying and the outdoors is not a controlled laboratory. The path might be wetter than expected, your socks might shift, your boots might feel different once your feet warm up, or a long downhill section might suddenly expose a pressure point you hadn’t noticed on flatter ground.
When that happens, the most important thing is not to wait and see how bad it gets.
That’s the mistake most of us make. You feel something starting, decide it isn’t worth stopping for, and carry on because you’re nearly at the next bend, or the next gate, or the next place that looks like a sensible stopping point. Then the next place comes and goes, and by the time you finally take your boot off, the skin has already been rubbed enough to make the rest of the hike more uncomfortable than it needed to be.
If you feel a hotspot starting, stop as soon as you reasonably can. You don’t need to collapse dramatically onto the nearest rock like you’ve been wounded in battle, but you do need to take it seriously. A hotspot is the easy stage. Once it becomes a blister, you’re not preventing the problem anymore, you’re managing the damage.
Take your boot or shoe off and actually look at the area. That sounds obvious, but it’s easy to just wiggle your sock around and hope for the best. Check whether the skin is red, warm, tender, or starting to lift. Check whether your sock has bunched up, whether there’s grit inside your shoe, whether your foot is damp, or whether your lacing has loosened enough for your heel or forefoot to move more than it should.
If the skin is still intact and it’s just a hotspot, dry the area if you can and cover it before you carry on. Tape, a blister plaster, or a proper dressing can all help, depending on what you’ve got with you and where the rubbing is happening. The important thing is to apply it smoothly and securely, because a badly applied bit of tape that wrinkles under your sock can become the next problem, which is the sort of pointless little betrayal hiking is very good at arranging.
Once the area is protected, think about what caused the rubbing in the first place. If your heel was lifting, relace the boot so your heel sits more securely. If your toes were sliding forward, especially on descents, adjust the lacing around the midfoot so your foot is held back without crushing your toes. If your sock is damp, change it if you’ve got a dry pair. If there’s grit, grass seed, or some tiny bit of trail debris in your footwear, get rid of it properly rather than giving it another mile to make its case.
This is also where pace matters. If you’ve caught the problem early and protected it well, you may be able to carry on normally. But if it still feels tender, slow down a bit and pay attention for the next few minutes. There’s no prize for powering through a preventable blister, apart from the deeply unsatisfying prize of actually having a preventable blister.
If the area keeps hurting after you’ve adjusted everything, stop again. Maybe the tape has shifted, maybe the pressure point is still there, or maybe the skin is already more irritated than you realised. It’s better to stop twice for a few minutes than to spend the last part of the hike walking in pain and pretending you’re fine.
For group walks, I think it helps to get over the embarrassment of stopping early. Most people would rather wait two minutes while you sort your foot than spend the next two hours watching you limp along and slowly become less fun to be around. And if they wouldn’t, that’s useful information about the group.
The main rule is simple: the moment your foot starts asking for attention, give it some. Don’t panic, don’t overthink it, and don’t assume it will magically disappear if you keep walking. Stop, check, dry, protect, adjust, then carry on.
That small pause can be the difference between a minor annoyance and the thing that ruins the rest of the hike.
How to Treat a Blister While Hiking
If a hotspot is the warning stage, an actual blister is the point where you’ve missed the easiest window, but that doesn’t mean the hike is ruined. It just means the aim changes. You’re no longer trying to stop the blister forming, you’re trying to protect it, reduce the rubbing that caused it, and get yourself back comfortably without making the damage worse.
The first thing is to check whether the blister is still intact. If it is, try to keep it that way. The skin over the blister is doing a useful job, even if it looks annoying and feels like it has no place being attached to your foot. It protects the raw skin underneath, and once that top layer is broken, the area becomes more vulnerable to dirt, rubbing, and infection. The NHS gives the same basic advice: keep blisters clean, cover them with a soft plaster or padded dressing, and don’t burst them yourself.
If the blister is small and still closed, clean and dry the area as best you can, then cover it with a blister plaster, padded dressing, or tape arrangement that protects it from more rubbing. The important thing is not just covering the blister itself, but reducing the pressure around it. If the dressing simply presses harder into the sore spot, you’ve technically done something, but not something your foot is likely to thank you for.
For blisters on weight-bearing areas, like the heel, ball of the foot, or side of the toe, padding can make a big difference. Some people use a doughnut-style pad, where the pressure is taken around the blister rather than directly on top of it. You don’t need to get fancy, but the idea is: protect the damaged area without squashing it every time you take a step.
If the blister has already burst, don’t peel the loose skin away unless it’s filthy, torn beyond use, or clearly causing problems. That remaining skin can still give the raw area some protection. Let any fluid drain, clean the area if you can, and cover it with a clean dressing or blister plaster. This is one of those moments where clean hands, clean dressing, and a bit of patience matter more than trying to perform heroic foot surgery on a damp rock beside a footpath.
You also need to deal with the cause, not just the blister. This is where people often go wrong. They cover the blister, put the same boot back on in exactly the same way, and then wonder why it still hurts ten minutes later. Again, we’ve covered this already, but it’s worth mentioning again – if your heel was lifting, relace the boot. If your sock was damp, change it. If your toe was being squeezed, adjust what you can. If grit or a crease caused the rubbing, get rid of it properly. The plaster protects the damage, but it won’t magically fix the thing that caused the damage in the first place.
If the blister is painful enough that you’re changing how you walk, be careful. Limping for miles can create other problems because you start loading your foot, knee, hip, or back differently. Sometimes the sensible thing is to shorten the route, slow down, or head back earlier than planned. That’s annoying, obviously, but it’s still better than turning one blister into a full-body grudge match because you refused to accept you couldn’t continue hiking.
After the hike, clean the blister properly and keep it covered while it heals. Most simple blisters settle on their own, but keep an eye on anything that becomes increasingly red, hot, swollen, painful, or filled with yellow or green fluid, because those can be signs of infection. If that happens, or if you have diabetes, poor circulation, or any condition that affects healing, it’s worth getting medical advice rather than treating it as just another hiking nuisance. NHS guidance also recommends seeking help if a blister looks infected, is very painful, keeps coming back, or appears in unusual places.
The short version is this: keep it clean, keep it covered, don’t pop it just because you’re impatient, and don’t keep walking in the exact conditions that caused it. A blister is already your foot telling you something went wrong. The trick is to listen before it starts putting the complaint in writing.
Frequently Asked Questions
Should you pop a blister while hiking?
In most cases, no. If the blister is still intact, it’s usually better to leave it alone, cover it, and protect it from further rubbing. The skin over the blister helps protect the raw area underneath, so bursting it too early can make it more vulnerable to dirt and infection.
If a blister bursts on its own, clean it as well as you can, leave any loose skin in place if it’s still protecting the area, and cover it with a clean dressing or blister plaster.
Why do I keep getting blisters in the same place?
If you keep getting blisters in the same place, that usually means the same pressure point, rubbing point, or movement problem is happening each time you hike. It might be your heel lifting, your toes pressing together, your foot sliding forward downhill, or a sock or seam irritating the same patch of skin.
That repeated pattern is useful information. If you know where you usually blister, protect that area before the hike starts rather than waiting for it to hurt again.
Are hiking blisters caused by bad boots?
Sometimes, but not always. Badly fitting boots can definitely cause blisters, especially if they let your heel move, squeeze your toes, or create pressure in one spot. But decent boots can still cause problems if your socks are wrong, your feet get damp, your laces loosen, or you ignore early hotspots.
It’s usually better to think in terms of the whole setup rather than blaming one thing.
Do hiking socks really help prevent blisters?
Yes, good hiking socks can make a real difference. They help manage moisture, reduce rubbing, and add cushioning where your feet need it most. They won’t fix badly fitting boots on their own, but they can reduce one of the biggest blister risks: damp, irritated skin rubbing inside your footwear.
Cotton socks are usually a poor choice for hiking because they hold moisture and tend to stay damp once your feet start sweating.
What should I put on a hotspot while hiking?
If the skin is still intact, dry the area if you can, then cover it with tape, a blister plaster, or a dressing that stops the rubbing. The key is to apply it smoothly so it doesn’t wrinkle under your sock and create another irritation point.
You should also fix whatever caused the hotspot in the first place, whether that means adjusting your laces, smoothing your sock, removing grit, or changing into dry socks.
Can you keep hiking with a blister?
You can often keep hiking with a blister if it’s properly protected and not too painful, but you need to be sensible. Cover it, reduce the rubbing, slow down if needed, and keep checking whether it’s getting worse.
If the blister is making you limp or change the way you walk, it may be better to shorten the route or head back, because walking awkwardly for miles can create other problems.
How do you stop heel blisters when hiking?
Heel blisters usually come from heel movement, rubbing, or pressure at the back of the boot. To stop them, make sure your heel is seated properly before lacing, use a secure lacing method, wear socks that don’t slip or bunch, and protect any known rubbing points before you start.
If your heel keeps lifting no matter what you try, the boot may be the wrong shape or size for your foot.
Final Thoughts
Blisters are one of those problems that are easy to overlook until they’ve already got your full attention.
The useful thing to remember is that they usually don’t come from nowhere. Most of the time, there’s been some kind of warning, a bit of rubbing, a damp sock, a heel lifting slightly, a toe getting squeezed, or a hotspot you noticed earlier and hoped would settle down on its own.
I think that’s the main lesson with blister prevention. It’s not really about having perfect boots, perfect feet, or every blister product ever made. It’s about knowing where your own weak spots are, setting yourself up properly before you start hiking, and being willing to stop for a couple of minutes when something feels off.
That might not sound like much, but it’s usually the difference between a small irritation and a hike that slowly becomes all about your foot.
So before your next hike, check the basics. Make sure your socks are sitting properly, your boots feel secure, your usual problem areas are protected, and your blister kit is somewhere you can actually reach it. Then, once you’re out there, don’t ignore the early signs just because stopping feels inconvenient.
A few minutes sorting a hotspot is almost always better than spending the rest of the hike wishing you had.
